社区微信群开通啦,扫一扫抢先加入社区官方微信群

社区微信群
项目地址:http://pandao.github.io/editor.md/
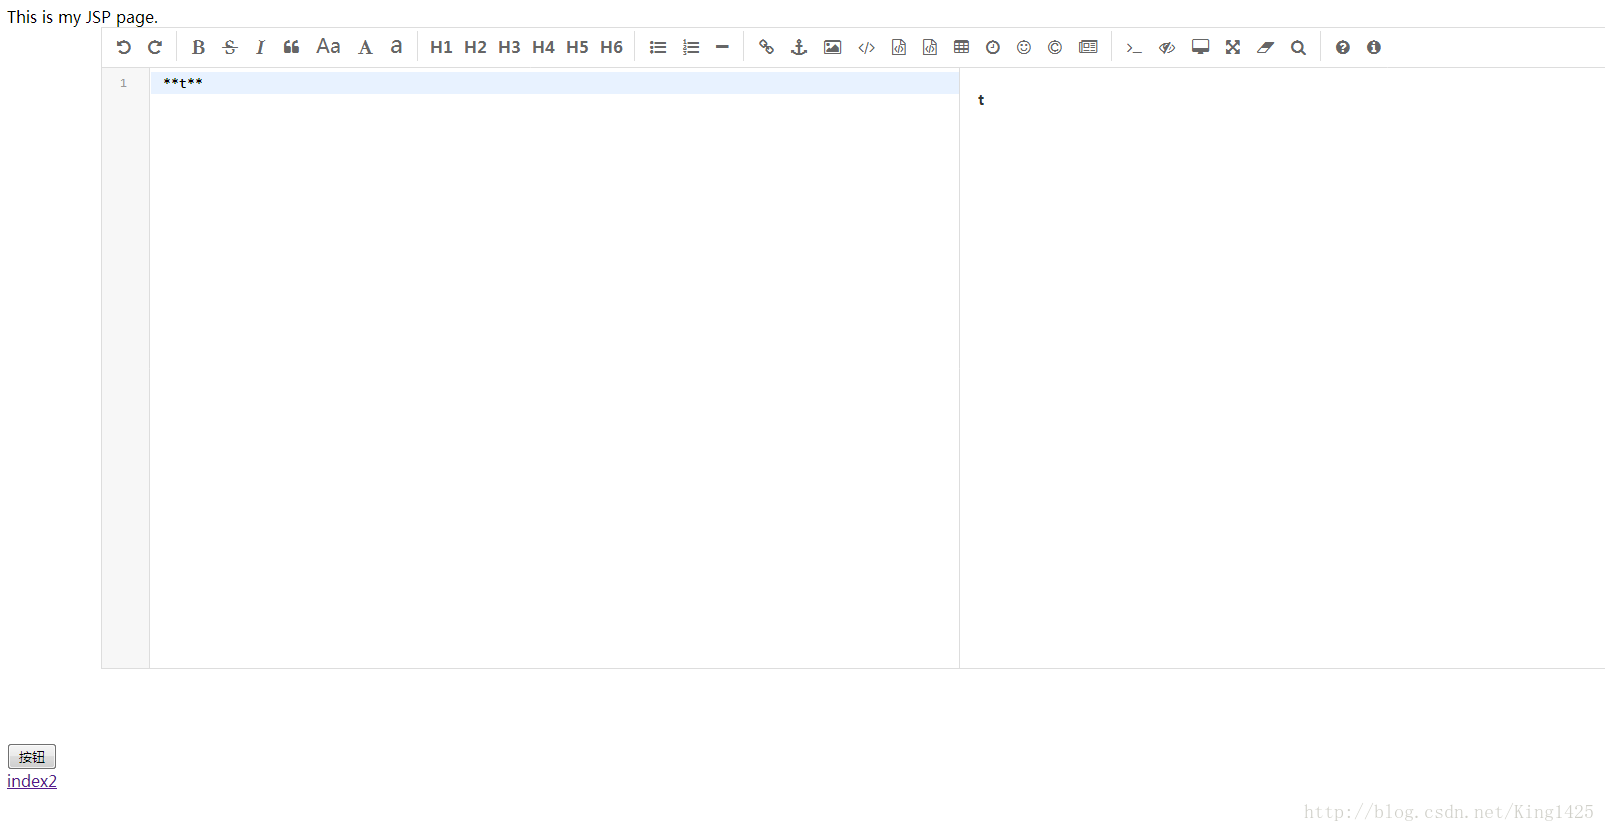
如图:
<!-- editormd start -->
    <link href="<%=path%>/app/editormd/css/editormd.min.css" rel="stylesheet" type="text/css" />
    <script type="text/javascript" src="<%=path%>/script/jquery-1.9.0.min.js"></script>
    <script type="text/javascript" src="<%=path%>/app/editormd/editormd.min.js"></script>
    <script type="text/javascript">
  var testEditor;

  testEditor=$(function() {
      editormd("test-editormd", {
           width   : "90%",
           height  : 640,
           //markdown : md,
           codeFold : true,
           syncScrolling : "single",
           //你的lib目录的路径
           path    : "<%=request.getContextPath()%>/app/editormd/lib/",
           imageUpload: false,//关闭图片上传功能
          /*  theme: "dark",//工具栏主题
           previewTheme: "dark",//预览主题
           editorTheme: "pastel-on-dark",//编辑主题 */
           emoji: false,
           taskList: true,
           tocm: true,         // Using [TOCM]
           tex: true,                   // 开启科学公式TeX语言支持,默认关闭
           flowChart: true,             // 开启流程图支持,默认关闭
           sequenceDiagram: true,       // 开启时序/序列图支持,默认关闭,
          //这个配置在simple.html中并没有,但是为了能够提交表单,使用这个配置可以让构造出来的HTML代码直接在第二个隐藏的textarea域中,方便post提交表单。
           saveHTMLToTextarea : true
      });

  });

</script>
  <!-- editormd end -->
每个 Editor.md 的 ID 元素下都有一个保存 Markdown 源码的 Textarea,你也可以通过设置开启另一个保存 HTML 源码的 Textarea,可以按需要获取相应的值,如下:
<body>
    This is my JSP page. <br>
    <!-- editormd start -->
    <div class="editormd" id="test-editormd">
    <textarea class="editormd-markdown-textarea" name="test-editormd-markdown-doc" id="editormd"></textarea>
    <!-- 第二个隐藏文本域,用来构造生成的HTML代码,方便表单POST提交,这里的name可以任意取,后台接受时以这个name键为准 -->
    <!-- html textarea 需要开启配置项 saveHTMLToTextarea == true -->
    <textarea class="editormd-html-textarea" name="editorhtml" id="editorhtml"></textarea>
    </div>
    <!-- editormd end -->
然后刷新界面应该就显示出编辑器了。
 <!-- editormd 测试  start -->
    <p id="p1"></p><br>
    <p id="p2"></p><br>
    <button id="btn">按钮</button><br>
    <!-- 点击进入index2界面,即HTML前端展示界面 -->
    <a href="/ssm/login/editormd">index2</a><br>

     <script type="text/javascript">
     $('#btn').click(function() {
       //获取第二个textarea的值,即生成的HTML代码   实际开发中此值存入后台数据库
       var editorhtml=$("#editorhtml").val();
       $("#p1").text(editorhtml+" editorhtml");
       //获取第一个textarea的值,即md值  实际开发中此值存入后台数据库
        var editormd2=$("#editormd").val();
       $("#p2").text(editormd2+" editormd");

     });

     //刚进入文档的时候,可以给第一个textarea设置初始md。  实际开发中从后台获取
     $(document).ready(function() {
      var md="**t**";
       $("#editormd").text(md);
     });
     </script>
      <!-- editormd 测试 end -->
  </body>
</html>
index2.jsp
<!--editormd.preview start -->
<link rel="stylesheet" href="<%=request.getContextPath()%>/app/editormd/css/editormd.preview.min.css" />
<link rel="stylesheet" href="<%=request.getContextPath()%>/app/editormd/css/editormd.css" />
<!-- <div class="content" id="content">${faq.text }</div> ${faq.text }内容为从服务器获取的HTML-->
<div class="content" id="content"><hr> <p>rewtf<strong>erwefgfewfwsvc</strong></p> <blockquote> <blockquote> <hr style="page-break-after:always;" class="page-break editormd-page-break" /></blockquote> </blockquote> <hr style="page-break-after:always;" class="page-break editormd-page-break" /><p>[========]<br>| | |ul<br>| —————— | —————— |<br>| | |<br>| | |</p> <h1 id="h1-erftewg"><a name="erftewg" class="reference-link"></a><span class="header-link octicon octicon-link"></span>erftewg</h1><pre><code>@RequestMapping("/activatemail") private String activatemail(String actiCode,String email){ logger.debug("ws-----activatemail----actiCode="+actiCode+" email="+email); Person person = new Person(); person.setActiCode(actiCode); person.setMail(email); boolean isAc = this.personService.activatEmail(person); if(isAc){//激活成功,3秒跳转 return "activateCode"; }else{ //激活失败页面 return "activateCode"; } }jyghjmmkghmkghm </code></pre><p>```uluil,ui.,u.,uo.uokiulk</p></div>
<script type="text/javascript" src="<%=path%>/script/jquery-1.9.0.min.js"></script>
<script src="<%=request.getContextPath()%>/app/editormd/lib/marked.min.js"></script>
<script src="<%=request.getContextPath()%>/app/editormd/lib/prettify.min.js"></script>
<script src="<%=request.getContextPath()%>/app/editormd/editormd.min.js"></script>
<script type="text/javascript">
editormd.markdownToHTML("content",{
htmlDecode : "style,script,iframe", // you can filter tags decode
emoji : true,
taskList : true,
tex : true, // 默认不解析
flowChart : true, // 默认不解析
sequenceDiagram : true, // 默认不解析
});
</script>
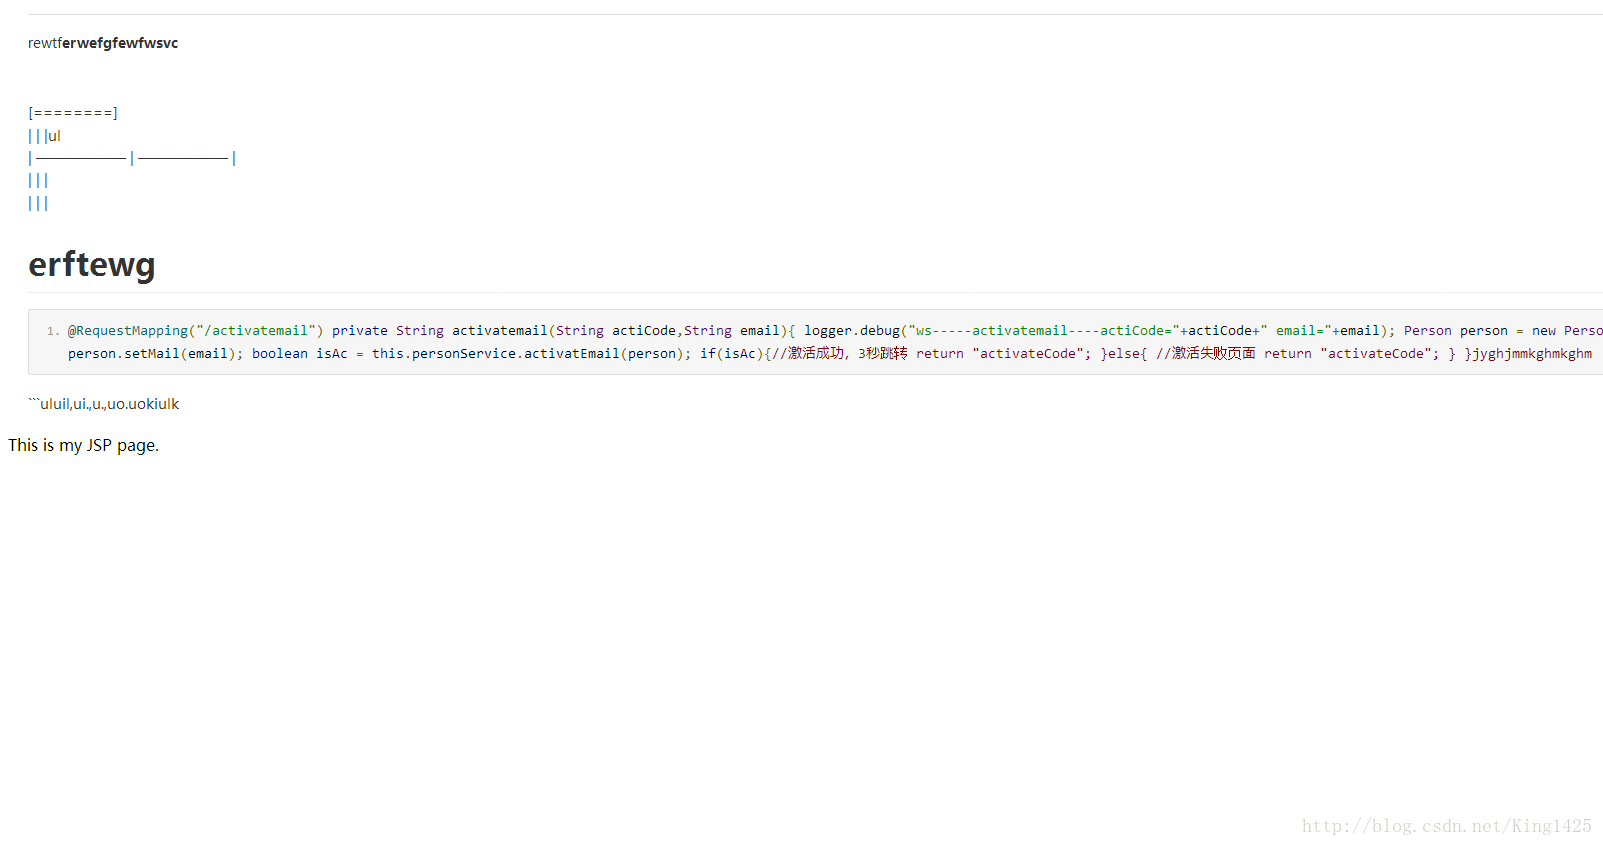
<!--editormd.preview end -->用HTML代码模拟测试 。实际开发从后台获取html,给content。
效果如图:
官方例子:http://pandao.github.io/editor.md/examples/custom-toolbar.html
 toolbarIcons : function() {
            // Or return editormd.toolbarModes[name]; // full, simple, mini
            // Using "||" set icons align right.
            return ["undo", "redo", "|", "bold", "hr", "|", "preview", "watch", "|", "fullscreen", "info", "testIcon", "testIcon2", "file", "faicon", "||", "watch", "fullscreen", "preview", "testIcon"]
        },
你可能看的莫名其貌,我如何知道有什么标签 (“undo”, “redo”, )怎么去掉一两个不需要的功能呢。
这时候就要看插件Js源码了。
源码中显示共有这些标签:
t.toolbarModes={full:["undo","redo","|","bold","del","italic","quote","ucwords","uppercase","lowercase","|","h1","h2","h3","h4","h5","h6","|","list-ul","list-ol","hr","|","link","reference-link","image","code","preformatted-text","code-block","table","datetime","emoji","html-entities","pagebreak","|","goto-line","watch","preview","fullscreen","clear","search","|","help","info"],simple:["undo","redo","|","bold","del","italic","quote","uppercase","lowercase","|","h1","h2","h3","h4","h5","h6","|","list-ul","list-ol","hr","|","watch","preview","fullscreen","|","help","info"],mini:["undo","redo","|","watch","preview","|","help","info"]}OK,根据自己需要的定制吧
如果觉得我的文章对您有用,请随意打赏。你的支持将鼓励我继续创作!